Friday, 3 June 2016

Springing into Action

                 What a crazy spring for seeding! Many farmers were active in the field or even finished seeding before May even began. I myself was quite warry of frost and therefore stuck to my original schedule. It definitely paid off because we experienced a freezing night or two in the middle of the month. Since we haven’t received any rain in May until recently, nothing has come up yet. The garden was getting really dry which makes germination really difficult even with additional watering. I’m glad we got a few inches of rain this week to really kick things into gear. I love seeing all the trees go from baron branches to lush and flowering in many spread out stages (also good for the bees!).

                The plants that I started indoors within the beginning of April are now at a decent size to transplant. I nailed the timing and watering strategy this year which yielded plants not too big (which are unwieldly) or small (which tend not to survive transplanting). The week of April 1st turned out to be a great week to start. As for watering, I had the 3’’ pots lined inside trays that held water. I watered the bottom of the trays and not the top to avoid a seedling disease called damping off that causes high mortality rates. In the next couple of weeks after the plant has clearly established itself, it’s better not to water too often so that you encourage root formation, but not too little in that the plant wilts.  I have struggled with this for the past couple of years so it’s feels great to finally get it right.  The plants are now hardening off outside because they are used to their warm cozy lifestyle indoors. Without slowly ‘’hardening off’’, the change in environmental conditions could cause severe wilting, sunburn, stem breakage or outright death. They need to be outside just during the day for 4 – 7 days and then outside all day and night for another 4 -7 days to accustom them to the sunlight concentration and fluctuating temperatures. It has been difficult to keep them outside for consecutive days due to high winds and rain, but they will be transplanted soon enough to hopefully reward me with early tomatoes, peppers, eggplant and brussel sprouts! 


                I started seeding and transplanting my other vegetables and fruit on May 5th and finished on May 22nd. Taking advantage of which crops can be seeded earlier or later based on their optimum germination temperature spread out the planting season for me. Cooler crops like peas, spinach, kale, and bare root raspberries and strawberries went in the first couple of weeks of May. Seeds planted mid-May included the majority of row crops like lettuce, onions, potatoes, brassicas, carrots, grain crops and herbs. The last crops to be planted were the warm season crops like corn, beans, melons, cucumbers and squash. I’ll also be trying to plant the sweet potato slips this week alongside the transplants. It seems as though all of my winter planning paid off; yielding a stress free planting season.
 

                This year we also got 8 more hive packages in the beginning of May. This brings us to a total of 16 hives which hopefully will be split into 20 in the next week or two. The older hives from 2014 and 2015 are massive and healthy with big bee populations coming out of the winter which is great to see! The hives that are 2 years old had their queens replaced to keep production at maximum and all hives are now medicated and ready to go. Hiving the new hives was also successful with my dad and brother being a invaluable help. The next step is to look out for the dearth period coming up in which all spring flowers are done producing and summer flowers haven’t started yet. Other than feeding and hive splitting, the next month should be fairly low maintenance in terms of beekeeping. 


Tuesday, 15 March 2016

A Warm Start

                I hope everyone is enjoying this absolutely gorgeous Manitoba “spring” weather (it’s not spring until March 20th according to my brother). I’m surprised that most of the snow has melted and that night temperatures are barely touching freezing.  Everyone is scuttling out of their homes to walk, run and play and I have already found one or two things to keep me busy.

                For tapping maple trees, this is about the same time as it occurred last year; close to St. Patrick’s day. These warm temperatures are doing wonders in terms of thawing the roots and activating the trees. The positive temperatures are great for pushing sap through the trunk, branches and holes of the trees but we still need negative temperatures for the suction (pulling) of water into the tree from the roots. They work together and without one or the other, sap won’t flow into your bucket. This upcoming week looks promising with both plus and minus temperatures but huge fluctuations between both are always better for a stronger flow.
                If you’re looking to tap your own trees, resources to acquire spigots will be at the bottom. If you have any other questions, don’t be afraid to ask. Tapping is fairly easy and it took my Dad, brother and I an hour to tap 45 trees. Maples can be difficult to identify at this time of year without the leaves, but just remember: maples have opposite branching (2 branches coming from the same point as opposed to alternating), deeply furrowed bark, reddish twigs, no dominant stem (usually don’t grow in a straight line a have a few codominant stems) and some still have the samaras (those dual blade helicopter seeds). 
                Once you have found a tree of a good size and health (at least 8 inches in diameter), drill a hole into the tree 2 inches in at chest height with a slight upward angle. Creamy white shavings should come out if you’ve found a good spot. A spigot can be tapped into the tree and we use a milk jug as our collection “pail” because they have UV protection, are enclosed so that bark/debris/precipitation doesn’t fall into it, and it can be emptied easily. I’ll give another update in a week or two as I continue this process and let you know how it’s going.

                Additionally, the bees were set out from their winter storage this week (two weeks ahead of last year). This unusually warm weather made things hard to keep the bees cool in storage which made them restless and forced us to put them outside. My dad and I lined them all up and closed off the entrances a bit to keep them warm for upcoming cooler weather. They actually don’t produce any waste all winter so I bet they were fairly relieved to be able to fly around and enjoy the warm weather this weekend.


                 Things at Jeffries Nurseries are also kicking into gear. In the last few weeks, we potted over 60,000 perennials for the greenhouse which gets us to being about half done. Lots still has to be done in order to be ready for shipping season coming up fast in the end of April. It’s absolutely amazing to see the greenhouse fill up and everything dormant and small bursting into life. 


Ken Fosty (204) 586-1365 kfosty@icenter.net 

Monday, 1 February 2016

Coming Out of Hibernation to Say Hello...


  I’M BAAAACK.
Hello everyone! I’m back after my busy fall of working and finishing University to update my blog (better late than never)! Its times like these when people are craving a fresh garden grown watermelon, tomato or raspberry. It also tends to inspire people to sign up with a local CSA producer.  CSAs can be so nice in the summer when you are in need of those fresh veggies and fruit for the cabin or home and you don’t have a large garden, don’t want to head out to the farmer’s market, or just basically don’t have the time or effort to supply enough for yourself. If this sounds like a venture that you’d like to be a part of let me know by sending me an email! There is still space available for you to join and purchase either a large or small CSA share (see the “CSA” tab for more details).

WHAT IF I CAN’T COMMIT?
If you also don’t want to commit to a full season, I have a “pay weekly” CSA option where you can contact me right before your favorite part of the season to pay as you go. It is however more cost-wise to get a small or a large CSA. I deliver mainly to the Carman, Morden, and Winkler area. I also deliver right to your door which some larger CSAs won’t do. If you have any more questions, contact me at hamiltop72@gmail.com

A LITTLE MORE ON WHAT I’VE BEEN UP TO…
                Since the beginning of a new year, Hamilton Hills Produce has kept quite busy. Even though farms across Manitoba look quite dormant in the winter due to their overwhelming white frozen landscapes, they never really slow down. A lot of producers in the winter keep busy on the computer while updating their finances, planning for next year, gathering supplies, fixing equipment, erecting new buildings and marketing their products. I have spent the month of January working through budgets and finance sheets for the bees while also constructing which varieties of veggies and fruits get to make it onto the acreage. The next step for February is to nail together some new bee hives and get together some seed and supplies for the fruit and veggies. I’ll keep you updated on what’s going on!

                I also recently attended the 2016 Mblog conference downtown Winnipeg and received some useful tips and strategies to make this blog a more of an insightful read. I plan to blog even more content this coming year, aimed at helping readers to become more involved in the horticultural community and attain new knowledge about growing and caring for a wide variety of food and landscape plants. Areas of interest include vegetables (of course), herbs, fruits, syrup, perennials, shrubs and trees, and bees. I’ll be working from the soil up and from planting to harvest while trying to cover all areas of production from the producer to the consumer.  For any season other than summer, I’ll be posting about 2 times per month, otherwise, it will be once per week. Looking forward to it!

Cheers!

Saturday, 15 August 2015

Más Frutas

                More fruit is on the way as I have just recently planted 14 more fruiting trees at my grandpas farm this week! I planted five dwarf apple trees (“dwarf” allows more trees per acre and fruit that is ready in less years that normal sized trees), two pear trees, two more crab apple trees, three apricots and two plum trees.  Thanks to my coworkers at Jeffries Nurseries for supplying great quality trees!

                I have learned that there are a few things to keep in mind when planting trees in general. Water is the most important element to control. They should be watered at planting and then watered every two days for about a month. After that, about every week or in very dry conditions and finally, watered very good right before freeze up. When the tree is freshly planted, the surrounding soil around the newly planted root ball acts like a wick and sucks away all moisture from it leaving it very dry. So people who plant a tree on a Friday and come back on a Monday from camping can sometimes see a somewhat sick or drying tree. I should also mention that it seems like planting can happen anytime right up to freeze up.

                If I back up for just a second, I should mention a thing or two about the actual planting first. You just need a large enough hole dug so that the root ball can fit and have its soil line just a bit lower than ground level (so that water flows to the roots, not away.) It is also recommended that you use potting soil to fill in the space between the root ball and ground soil. After the tree is in the ground, and the potting soil is used and packed in and on top a bit, make sure a sort of water bowl is constructed so that when you water heavy (never water light, you really want the water to penetrate the whole root ball), that the water flows and stays on the root ball and not to the surrounding ground.

Clockwise starting top left: Apricots, Pear, Pear/apples, Dwarf apple

                A couple other things to think about before even planting are which varieties to choose and where to plant. Check to see if the variety of tree chosen needs a pollinator in order to set fruit. If so, that means that you need to also choose a genetically different tree to plant as well. Many fruit trees will not self-pollinate themselves or pollinate with another tree that is that same variety. As for the planting site, planting in sheltered areas is always preferred with fertile, well-drained soil. Make sure you also give it space to grow on all sides. It may look small now but you have to think about the potential. Some may have a 20’’ radius when fully grown.

                I had plenty of crab apples to go around this year from the trees that were planted many years ago (as you can see from the top picture). You can also see from the pictures that the strawberries, raspberries and blackberries are getting some great plant mass and will hopefully be less vegetative and more productive next year.  I plan to plant perhaps 10 more apples, two more of each other kind of tree and also expand into saskatoons, cherries and sea buckthorn and haskap next summer. We’ll see how it goes.   Cheers!


Left to Right: Raspberry, Blackberry and Strawberry plant

Thursday, 6 August 2015

Endless Summer

               Wow, really haven’t blogged in a while! I hope everyone is having a great summer so far, enjoying this gorgeous weather, time with family and friends and maybe relaxing or taking a break once in a while. If you don’t, this summer might just whiz past you and send you into the cold depths of winter again without you realizing. It’s already August! Get out there and enjoy these last couple of months of the most tolerable outdoor conditions of the year.

                The main reason I haven’t blogged recently is just because that I'm a tad overworked. Between weeding, harvesting veggies and tending to the bees, I really have my hands full. Thank goodness for my mom begin there to help me prepare and wash the produce for the farmers market and CSA packages. I also wouldn’t have perfect timing or execution in terms of catching the bees at the right time without my dad. My brothers have also been tolerating me by helping me here and there.

                The last time I blogged I was talking about a hail storm. Maybe everyone has been sweating waiting for my next post to see how everything survived haha… well a lot of the roots and small crops were left unscathed and went to business as usual (this include lettuce, beets, potatoes, beans, peas etc.) The vines took a little bit of a hit with shredded leaves and such but were only put back in production by a week. Maybe corn took the biggest hit. There was maybe 30% yield loss and a delay in harvest but because I planted way too much, I should be fine.


                Weeding of course still acts like my ball and chain but my goal is just to not let anything go to seed. I’m trying to look at the bright side and see that they are creating a nice ground cover, feeding those beneficial microscopic critters in the soil and creating a lot of mulch and compost for next. As for veggies harvest, it kicked off with radishes, rhubarb and zucchini and such and now has moved to beans, peas, beets, lettuce, spinach, kale and cucumbers. Potatoes, onions are creeping in now along with corn, watermelon and cantaloupe approaching quickly on the horizon

.


                Once last very important and exciting note that I should hit is that fresh honey is now in! With the help of Ian and his extraction team I now have plenty of sweet, sweet canola honey ready.  If anyone is interested let me know (I also deliver)  My prices are as follows:

$6.00/  1/2kg
$10.00/ 1kg
$25.00/ 3kg
$40.00/4L Ice cream pail

                A few of the pictures below include Brody beside the hives with  stacked supers, a frame that is about 75% capped and ready to extract, capped vs uncapped comb, my dad loading some of the supers, and the finished filled honey containers in my garage.


Cheers!

Sunday, 28 June 2015

Hail Storm... Trying to Bee Optimistic


                For many people in the Miami, Roseisle and Rosebank area, a lot of damage was dealt this Saturday afternoon by hail, strong winds and rain.  I was in my large garden at the time when all of the sudden the mosquitoes stopped biting, the air went calm and the sky went dark. I didn't think much of it and as it started to rain, I thought to myself that I have worked in worse weather than this before. So I continued. As a small white object landed directly on a beet I was working on, absolutely demolishing it, I began to be concerned. Then almost in an instant the balls of ice rained down harder and harder until all I could see in front of me as I was running was a wall of falling ice and the ground turning white.  I felt sick to my stomach for my plants that I have put so much energy and time into as I ran to my car and was forced to drive home.

                As I came back about an hour later, the storm had cleared, and everyone was checking out the damage including farmers, people in town and everyone in the area. Farmers’ fields showed the biggest devastating blow as wheat fields were severely lodged, corn was ripped to shreds and canola leaves had what looked like bullet holes. I drove through town and saw branches everywhere on the streets with everyone checking the status of their now not so pretty flower beds and backyard gardens. I believe Roseisle may have got the worst of the hail though with hail the size of tennis balls. Most cars, trucks and trailers had huge unsightly dents. I heard that Rosebank and other homes in the area had the siding of houses ripped off by the apparent tornado and 100km/hr winds. Check out the full newspaper article here:  http://www.pembinavalleyonline.com/local/44853-pembina-valley-under-tornado-warnings-again

                I will be checking back at my garden within the next few days to see how it’s doing. Today it seemed relatively okay but definitely set back. The most damage was seen in corn, watermelon, cantaloupe, cucumber, cabbage, broccoli, cauliflower, beets and carrots. Some might bounce back but it’s too early to tell. The weeds are not really helping. I have been ears deep in portulaca for weeks now and it’s not letting up (which is why I haven’t been blogging or doing much of anything else). If anyone is up for helping me, even for a few hours, let me know because it’s a lot for just one person to keep up with…

                But I’m trying to bee positive. The benefits of diversification are shown in this situation because as the bees are hail proof, the veggies are not. I took a look at the bee colonies today and they look absolutely fantastic. The dearth period is now over, the canola is flowering, the bees are happy and I’m happy. The bees are shooting out of the hive like missiles on a mission and bumbling back heavy with pollen sacs and stomachs full of goodies. I did some final adjustments on the hive to increase air circulation, comfort and efficiency and now they should be good for the season until harvest!


                More updates will be given as the real damage starts to show in the veggies. I'm keeping hopeful and staying optimistic for all of the farmers out there that have lost a great deal of the hard work put into their crops this season. It’s devastating. I felt bad for my one acre, I can imagine how rotten it must feel to have hundreds of acres put under this stress.  I also feel sorry for the backyard gardeners and the landscaping enthusiasts. These people were simply just trying insert a little beauty into their lives or produce a couple tomatoes to show off their green thumb. Don’t lose heart, this wasn't your fault, you’re not a worse gardener because of it and please just keep your chin up because it can always be worse. 


Sunday, 14 June 2015

Weeding and Bee Feeding


                This week while walking out to garden, eager to see what new crops have decided to show their leaves, I was shocked (but really shouldn't have been too shocked) to see the glorious amount and variety of weeds that have risen and arrived from who knows where. Every year is the same thing; pluck them out and then welcome back the same amount next year. Even though none of them last year went seed, how do they keep getting here?

                To actually be introduced into what is called the seed bank, they can come in via wind, by animal, creep in from field edges, equipment with soil on it or by adding new soil. With some seeds that are already present, they do not germinate in the year that they were introduced and enter what is called a seed dormancy (more on that later). Some weed seeds have the potential to stay dormant for 40 years or more before they germinate (this is already beginning to look like a battle you can’t readily win…) To make things worse, weeds are very prolific seed producers. Purslane can produce as much as 52,000 seeds, lamb quarters 72,000 seeds and pigweed an obscene 117,000 seeds which all have to potential to grow into its very own weed over the years. They’re adapted to spread, distribute themselves, grow rapidly, and occupy almost any site disturbed by man over the centuries (I almost wish our man-made crops were this hardy and easy to grow.)  Below are some of the early season wave of weeds I’m dealing with this week including:

Maple: My most abundant but very easy to pull out weed. Both of my garden are surround by maple trees (a battle I have to deal with.) This is the first plant in Manitoba to make a mature seed before anyone else.

Buckwheat: and other volunteers such as canola, sunflower, tomato, cucumber and herbs are also now labelled as weeds since they are in the wrong place at the wrong time.

Kochia: Soft leaves and easy to pull out. This came with the new soil that we added.

Canada Thistle: The spiky one which can produce a root meters long into the soil. Try use a trowel to get as much as the root as possible. It creeps in from the field edge.

Absinth: Your hands will stink after you touch this(but it’s not stinkweed.) Easy enough to pull out. Not a big seed producer.

Purslane (portulaca): A very prolific seed producer, produces many tiny seedlings that are difficult to pull out. Apparently hoeing/chopping it up produces new plants from every chopped plant part, be very careful.

Stinkweed: doesn't stink, low populations, high dormancy it seems, easy enough to control.

Dandelion: There’s your blurry action shot for the day. As you can partly see, use a trowel to try to get most of the root out. Try not to let to go to seed (I did by accident- whoops.)


                 As you may have noticed, I don’t use any pesticides and only manual labor to kill my weeds. Other options that I have seen people with smaller stretches of land use is weed barriers which can just be newspaper laid down, mulches, wood chips or plastic bought from a store. The idea is that less sun hitting the soil, the less their dormancy can be broken by light. There may also use home remedies or organic pesticides that can be used but I myself would be scared of killing anything in the large variety of crops by spray drift. Effectiveness is also variable. Strategic planting with tilling can be used if you didn't plant your rows too close together. This may waste land in my opinion that could be used for planting more crops. Flaming the weeds can also work as well if there’s a big patch. Get a jump on the weeds by seeding early and till a nice seed bed and then seed right away. Cover crops and planting plants not meant to be harvested (grasses, clover, legumes etc.) and cutting them could also be a good strategy for keeping the weeds down and for not starving the soil at the same time.  I don’t have the time or resources for many of these tricks right now but in future years I hope to incorporate more of them


                As I was weeding I was noticing that I should be thinning out some of these plants. It’s hard to take out a few of your own, but when the seeder makes a mistake and puts two or more plants right on top of each other, you have to sacrifice one or two to save the other. Otherwise, both would suffer in terms of quality and you wouldn't get a good crop from either. This is very important for all root crops to have sufficiently spaced roots. Plants eaten for leaves that are too close together also have their leaves turn yellow and lose quality. Corn should also be spaced far enough away from a neighbouring corn plant so that they are not competing and sucking up each other resources, causing each other to produce a poor cob. Many crops need this and since in many small seeded crop packets you are given lots of seed, you should feel okay for doing this. Check your seed packets for proper instructions on seed spacing or thinning. See below for a before and after example of beets.


                The next crops to show their leaves this week included more bulbs, grains and cool season crops. The crops below are potatoes, onions, quinoa, amaranth, cabbage, spinach, beets and cantaloupe. I hoping that germination will be over at the end of this upcoming week so that decisions can be made for next year and fertilization can start.


                All greenhouse plants are now outside and hardening off. Planting tomatoes and vines will be the next job this week along with more weeding and thinning. I will also be gearing up for the first farmers market this week! I will not be able to bring any produce since not even the radishes are ready yet, but I will have lots of honey and a small amount of maple syrup to sell. Come out on Friday, June 19th to say hello to the new and old vendors this week and start off this season with some wholesome produce and commodities made by your community! Visit the Carman Farmers Market facebook page for more details.


                Ah yes, it also says bee feeding in the title… the dearth period which I mentioned last week is upon us which means there are little to no flowers around for our  little bees to keep busy on until the big players such as canola and alfalfa come to play. This means that if the bees are low on food, protein or space to grow, I need to give it to them. The feed I’m giving to them in jars right now is a simple sugar-water mixture that needs to be filled regularly to grow these hives to a great size to capture the maximum benefits of the huge honey flow that will be coming in several weeks.
 

Sunday, 7 June 2015

Let it Grow

                I’m wondering how many more grow puns I can dish out.Things seemed to have slowed down a bit for me in the past week and a bit relative to seeding and I actually got a day or two off to reorganize myself and take a small break. In the veggie sector, we got a nice rain and a bit of warm and cool temperatures earlier on to hopefully encourage some great germination. The frost period is over so next I will begin to transplant squash, pumpkins, cantaloupe, watermelon and tomatoes into the garden. A lot of repotting into larger peat pots will be accomplished this week and then hardening off to transplanted into the garden. Peppers, and the small amount of cool season crops will hopefully be transplanted the week after along wtih the sweet potato slips after they are hardened off as well. 

                See below some picture of some seedlings I captured. In order: wheat, buckwheat/fenugreek, sunflower, pumpkin, radish, pea, corn and bean. The other collage contains in order: bareroot strawberry, transplanted strawberry, bareroot raspberry, transplanted raspberry, bareroot blackberry, rhubarb, asparagus and garlic.  The transplanted berries are already well on their way to producing fruit. Stay tuned for more updates!


                As for the bees, I recently finished treating/medicating for varroa mites and American/European foulbrood (AFB/EFB). Varroa destructor is a tiny reddish, flattened, oval parasitic mite that attaches to honeybees and infects them with a disease called varroosis. These mites develop on the bee brood right before the larva cell is sealed to mature into an adult bee. They drift into different colonies by hitching a ride on a honey bee once they bee reaches an adult stage. They can ultimately take down a colony if numbers get high enough.  AFB and EFB are a type of bacterium that affect the honey bee larva. Once ingested by the larva, it competes for food in the gut ultimately killing the larva. AFB and EFB are different types of bacterium that cause different symptom, the same results and require the same medication. Devastating results can result in the bee colony in some years if they don’t get their meds. (pictures taken from web, see links.)                               

Varroa: http://wgbis.ces.iisc.ernet.in/biodiversity/pubs/ETR/ETR49/American%20foulbrood.jpg
AFB: 
https://planbeeproject.files.wordpress.com/2012/11/apis33-l.jp


                Next up for the bees is to basically sit bit and relax a bit but check up on them about once a week. I just need to make they have water, protein, food and enough room to grow. There was lots of flowers available for foraging this past while with the flowers of choice being lilacs, dandelions, and other early perennial flowers both wild and tame. After the spring flowers finish and before the summer flowers, there may arise what is called a “dearth” period, if which there are no flowers to forage on. If they colonies don’t have high enough food stores, they will have to be fed.


Tuesday, 26 May 2015

Ready, Set, Grow


                Hey, sorry I didn’t post anything last week but I have been super busy with seeding, work, and the bees. I started seeding both my gardens on the 19th and we happened to have the same hot beautiful clear weather every day until this Saturday, the 23rd, in which I finished. I put a total of about 26 hours so far into seeding and I accomplished this by after getting off work, driving straight to the garden, and working till about 10 or 11 at night. I usually just used a headlamp or the trucks headlights when it got dark. It wasn’t so bad except for the enclosing sound of coyote howls and yapping approaching as the sun went away. It's enough to send shivers down your spine when all of the sudden the howls stop… but at least I got to see great sunsets everyday haha


                 I feel like I was a little late with my cool season crops but only time will tell  what happens when things start popping out of the ground. Right now there are a few vine crops emerging and the berry bare-root crops showing new growth. For now, I am just waiting for rain and watering lightly to hopefully encourage some germination.

                I didn’t think I would fill up the whole acre but I did! I’m pretty excited how things went so smoothly and how my new garden tools worked out. The bulb planter was definitely a good investment for seeding a 100 potatoes and 600 onion bulbs. Also the precision garden seeder saved my life for corn and bean planting. I ended up planting over 5000 feet of sweet corn which I’m pretty excited about. I hope that the new herbs and other crops that I have never tried before emerge well and that I can recognize any problems that come up. I think I have now perfected row spacing and seed depth management for most crops. The next step is to repot and harden off my greenhouse plants and transplant them out into the garden within the next couple of weeks.


                For the bees, my Dad and I have been medicating them for varroa mites and foulbrood in which I will be talking about in the next post. We were also examining the queens health and seeing that she survived the hiving process, and equalizing any hives to take from the rich hives and give more bees to the poorer, smaller hives. The queens looked great, see below for a picture of one and the finished seeded garden. 


Thursday, 14 May 2015

That New Bee Smell

                Five new hives were added to my bee venture on May 12th making a total of ten colonies for me. I hope to be a big-time beekeeper someday but for now I’m just taking small steps to accommodate the learning curve needed and to avoid catastrophes by beginner mismanagement. Everything went well and I placed these bees right next to my larger vegetable garden at my grandpas old farm. (Sorry in advance for the poorer quality photos Ceone, I only had my iPhone camera on me J)

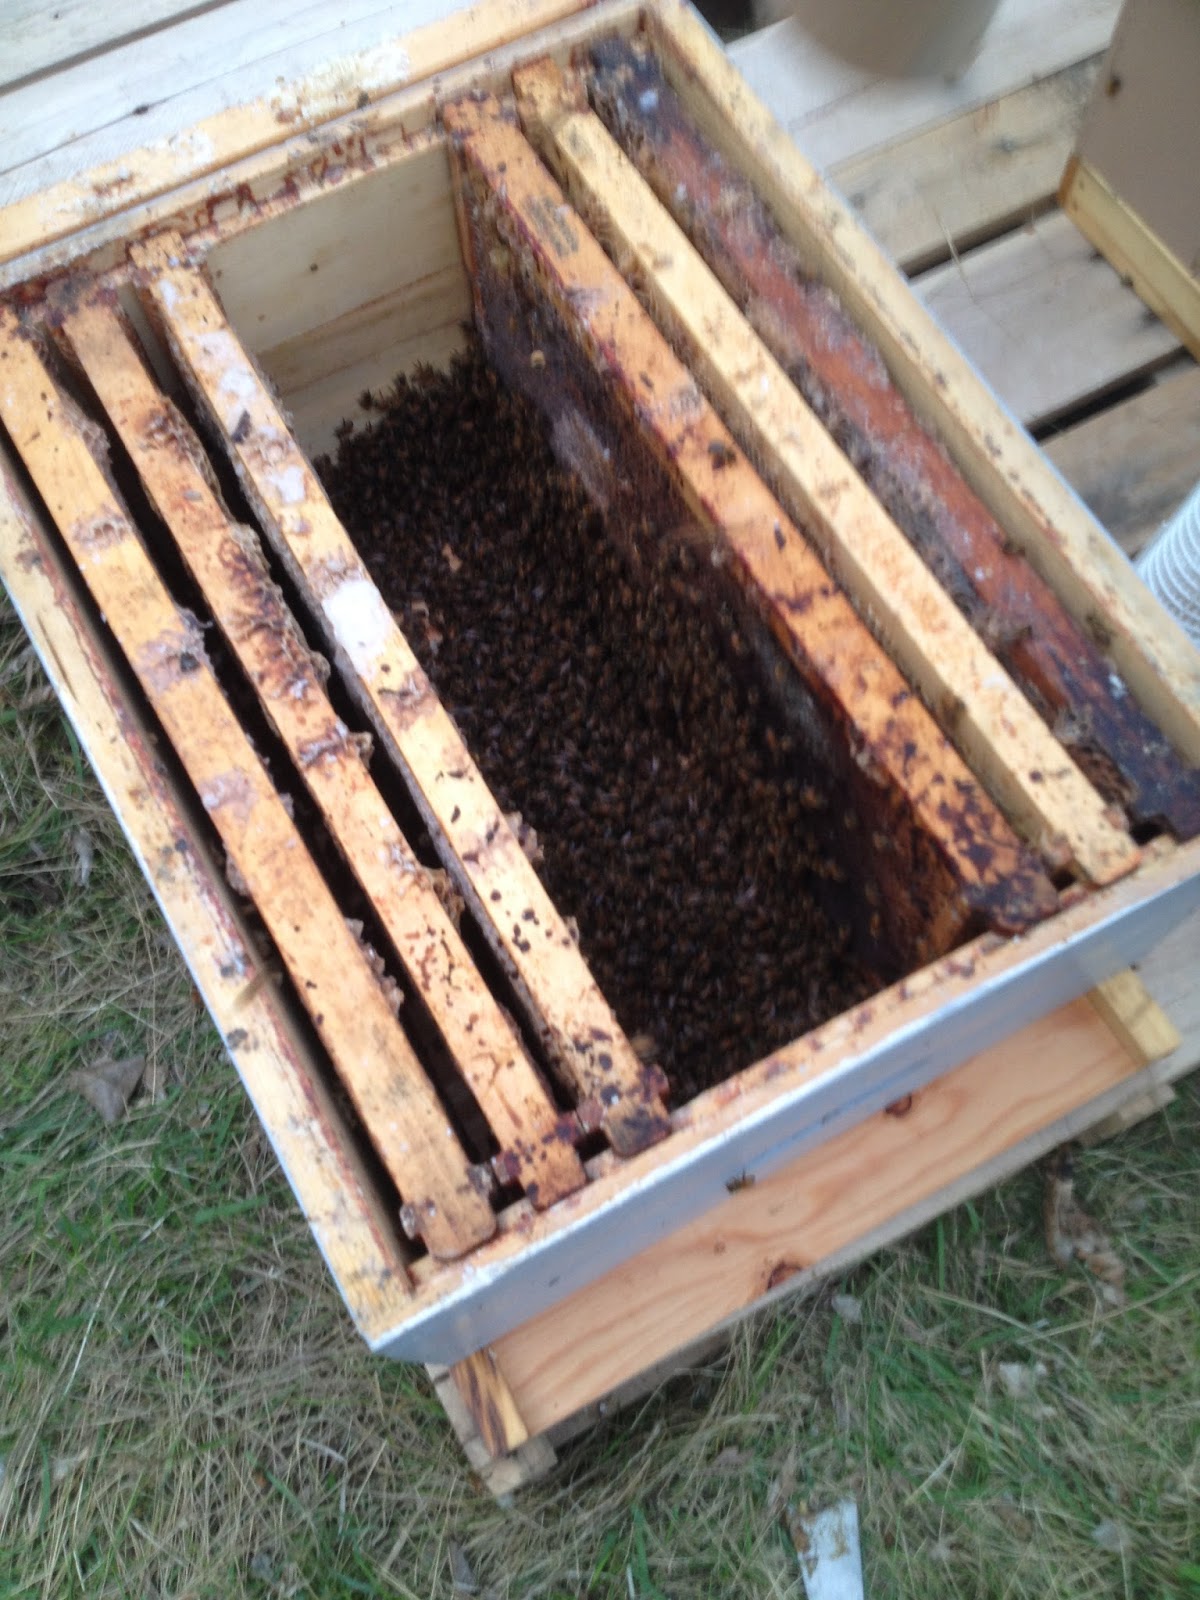
                The hiving process started in Winnipeg, where I picked up the bee packages at the bee retail and supply store called Beemaid. The bees come in a large tube as you can see called Arataki packages which originate from New Zealand. The package contains a kilogram of bees (perhaps roughly 20,000 bees) and also a queen inside a little wooden cage separate from the other bees.


                A few frames are taken out the hive to make room for the incoming bees and the hive and bee yard is carefully prepared beforehand. The first step is to (after staples are removed) to give the package a sharp tap on the ground (to get all of the bees to the bottom of the tube) and then remove the white cap on top. The queen cage is attached to a green mesh strip and taken out. All of the bees can be poured/tapped into the hive at this point.


                A cork is removed from the queen cage and replaced with sugar/wax. This is done so that the bees can slowly eat away at that sugar/wax barrier and gradually be introduced to the queen to get used to her. This helps to make the colony not so initially hostile towards her. The queen cage is wedged between a few frames, the hive is closed up and that is that! It’s fairly simple and actually pretty fun. My Dad and brother like helping me out with this process.


                The nest step it just to check and see if the queen is doing okay within the next few days and that she’s getting used to the place and laying eggs. I will have to start medicating them soon for varroa mites and American/European foulbrood (more on that later.)  As for the garden, my Dad and Grandpa tilled it up yesterday to make a nice seed bed and I measured out where everything is going to go. Seeding starts as soon as the soil can be worked in and I will start with the bare root stock and cooler season vegetables.


Monday, 11 May 2015

Tubers, Bulbs, Crowns and Slips

                This year I will be straying away from just planting seeds and will be experimenting with different plant propagation techniques and forms. New plants can be produced and planted in many various ways and I think it would be neat to outline several different basic types used in horticulture. (I'm about to dive into a little bit of science and biology so if you are interested, read on.)


               Of course using seeds is a lot of the time preferable. It’s usually the easiest, simplest and most economical process among these and since it is sexual reproduction (two plants breeding together) it leads to stronger, and more disease resistant plants.  This is the only propagating process that leads to genetically different offspring and more genetic diversity.  This can be an advantage for evolution purposes and survival or a disadvantage because you can’t get the same plant that you seeded unless you make it self-pollinate (and some plants can’t do this).  Seeds also take a long time to turn into a mature plant in some cases. There are also plants that don’t even produce seeds or if they do, they produce non-viable seeds.  Most of the plants I’ve dealt with from tomatoes to watermelon to basil are produced by seed and have many different varieties to choose from.

                The other option is asexual reproduction (or vegetative reproduction) which is when a single parent gives rise to an offspring. This can be through vegetative parts such as tubers, bulbs, roots, stems, leaves etc. There is no exchange in genetic information and thus the offspring is exactly the same as the parent – which can be a good thing for the gardener or producer. Other advanced propagation techniques which I might develop into in further years are layering, grafting and budding.


                Potato tubers are actually a modified stem, not a root, and this is because it has buds (unlike a root) and does not absorb nutrients or water (like a root should.) The weird thing is that potato plants can produce seed if conditions are right, but the seeds are either not viable or rare. Also (just to confuse you) sweet potatoes are enlarged storage roots, not stems like the regular potato. The picture below showing the purple leaved plants in a glass cup are actually sweet potato slips. There are many individual “slips” in that cup which are the sweet potato stems that were produced off a tuber by Winnipeg Sweet Potatoes (look her up on Facebook if you want to order some next year. They are a very interesting plant to grow and the person who produces has even more great ideas up her sleeve with her other ventures.)

                 Below are also onions and garlic which are produced by bulbs. The bulb is also a modified stem and the layers are actually thickened leaves for food storage. The green leaves you see above ground are its photosynthetic aerial leaves.  The individual garlic cloves are actually multiple stems that can be separated and planted individually.

                The weird looking forked thing alongside the greyish stringy root thing are actually a rhubarb and asparagus crown. The crown is just the part of the plant where the stem and the root join together just below the soil. These two plants are reproduced artificially and asexually by divisioning an existing plant into different parts and taking a part of the crown with it.


                Also off topic but since I’m talking about different planting techqniques, my strawberries, raspberries and blackberries will also be planted this year with two different methods. The first is the bare root method. This is the much cheaper option and all that you are given is a dormant root with a bit of dormant shoot. The first season planted in the ground is used for producing above ground shoots and plant establishment while fruit is only produced in the second or later years. The other option is purchasing a potted, already established older plant. This may be the more expensive option, but if you’re impatient, you can get fruit within the season that you plant.

Wednesday, 6 May 2015

Indoor Veggie Seeding


It has been an unusually warm spring so far it seems. Everyone is seeding quite early this year but I am still holding back just a touch so that my produce is ready only when the farmer’s market begins and so that I avoid any lingering frost.

                I started my “greenhouse” material this week in my living room on May 1
st. It is recommended that you start indoor seeding 6-8 weeks in most cases before the expected outdoor transplanting.  I tried that last year but the plants became too spindly and grossly large by the time I wanted to plant them outside and, in the end, were largely unproductive and very vegetative. This year I want stouter, stronger plants so I planned to plant my indoor material late and reduce the amount of light they get per day. Too much light (much like last year which was over 12 hours a day) can cause very spindly plants as it turns out.                
                My indoor seeding setup is just made up of two metal kitchen racks I snagged from IKEA. They seem to be able to fit all of my plant material nicely and are able to be adjusted when need. Attached to the metal racks are also greenhouse lights which produce a certain wavelength of light that tries to mimic natural sunlight for greater plant vigor.

                I start everything off by planting 2-3 seeds into little these little jiffy pellets that are basically just a small packet of peat material with enough nutrition and space for about 2 weeks of growth. After they have outgrown that, the plants are transplanted into 4’’ peat jiffy pots filled with potting soil. Once transplanting time approaches and the plants are big enough, they are slowly introduced to the outside conditions by bringing the pots out for an increasing amount of time for about a week. This is called “hardening off”, and has to be done to reduce the stress on the plant by the rapidly changing environmental conditions from inside to outside. The peat pots can then be cut and planted as is into the garden when ready.


               Heat loving, long season crops should be started indoors. I started all of my tomatoes, peppers, eggplants and squash indoors along with some watermelon, cantaloupe and pumpkins. Other crops of this type include cucumbers and zuchinni. These crops can also be planted outdoors when the soil has warmed up enough and when night temperatures are not too cold, which is what I do for most of my vine plants.

                Cool loving, long season crops include cabbage, cauliflower, broccoli, onions (from seed), spinach and kale. I planted a few test pellets of each just because I didn’t have any more space and also because I wanted to compare them to the plants seeded directly into the garden. These crops can be planted either indoor or outdoors.

                Cool loving, short season crops include beets, carrots, lettuce, onion sets, peas, potatoes, radishes, chard and turnips. These grow well under cool conditions, can be planted very early and will tolerate some frost. I should be planting some of these soon.

                Heat loving, short season crops include beans and some early varieties of sweet corn.  These should be seeded directly into the garden after the risk of frost has passed.


Thursday, 30 April 2015

Pruning Apple Trees

                I have never really pruned before but after going to a pruning seminar, doing extensive research and talking to my boss at Jeffries nurseries, I think I now am able to prune an apple tree and tell you how.  I have both 3 year apples trees and a 5 year apple tree and this apparently is the best time to be working on improving the structure of the tree. They are still a little young to prune for the purpose of improving fruit production. Other reasons for pruning might be for removing broken or diseased branches.

                The best time to prune is about now or in the fall when the tree is dormant. You should be taking off 15-20% of branches for young trees or 30% for older trees. If you prune too much off, the plant sets off these things called “suckers” which come out of the ground and resemble a stem. This happens because the roots are now relatively more active than the top growth, and the energy has nowhere to go, so suckers are created; which are counter-productive. Suckers may also appear if the tree is stressed, as you can see in this picture even before I pruned. 

                Pruners or clippers are used for small branches and saws or large shears are used for larger branches. Some say cutting on an angle (45 degrees) is better for shedding water. Others say cutting straight on (90 degrees) leaves a smaller surface area for diseases to infect. I choose straight on but we'll see how that goes. I was told at the seminar that you should cut low down to the collar of the branch while other people I have talked to said to leave a 1/4'' of branch left. I chose to do some of each. The picture below is a spur, a short stubby twig that will flower and produce fruit. It is recommended to prune spurs for larger fruit and to produce more spurs. Also remove any that are too close together or diseased.


                Types of branches you should be cutting of are ones that are criss-crossing, broken, diseased, downward/upward growing or are making narrow crotches. Apples trees also tend to have a dominant stem right in the middle that all of the other branches come out of. This is called having a central leader. Some people may keep it this way but others may strive to have an open centre. This allows for more air-flow, adequate light to hit all of the leaves and a higher yielding, more productive tree. In some trees, I kept the central leader because it was hard to remove without removing a large portion of the tree but in my older one (seen below) I strived to make an open centre.

     
    I have never pruned these trees before so I pruned them very hard. I think I may have pruned too much but they say it’s difficult to prune an apple tree too hard. I'll let you know what I did wrong later but here are my before and after pictures of the one tree. Sorry I rambled on a bit but it turns out that pruning trees in general is sort of an art and like most arts, it takes a lot of practice to get good. Just remember to stand back once in a while and look at the bigger picture.