Sunday, 7 June 2015

Let it Grow

                I’m wondering how many more grow puns I can dish out.Things seemed to have slowed down a bit for me in the past week and a bit relative to seeding and I actually got a day or two off to reorganize myself and take a small break. In the veggie sector, we got a nice rain and a bit of warm and cool temperatures earlier on to hopefully encourage some great germination. The frost period is over so next I will begin to transplant squash, pumpkins, cantaloupe, watermelon and tomatoes into the garden. A lot of repotting into larger peat pots will be accomplished this week and then hardening off to transplanted into the garden. Peppers, and the small amount of cool season crops will hopefully be transplanted the week after along wtih the sweet potato slips after they are hardened off as well. 

                See below some picture of some seedlings I captured. In order: wheat, buckwheat/fenugreek, sunflower, pumpkin, radish, pea, corn and bean. The other collage contains in order: bareroot strawberry, transplanted strawberry, bareroot raspberry, transplanted raspberry, bareroot blackberry, rhubarb, asparagus and garlic.  The transplanted berries are already well on their way to producing fruit. Stay tuned for more updates!


                As for the bees, I recently finished treating/medicating for varroa mites and American/European foulbrood (AFB/EFB). Varroa destructor is a tiny reddish, flattened, oval parasitic mite that attaches to honeybees and infects them with a disease called varroosis. These mites develop on the bee brood right before the larva cell is sealed to mature into an adult bee. They drift into different colonies by hitching a ride on a honey bee once they bee reaches an adult stage. They can ultimately take down a colony if numbers get high enough.  AFB and EFB are a type of bacterium that affect the honey bee larva. Once ingested by the larva, it competes for food in the gut ultimately killing the larva. AFB and EFB are different types of bacterium that cause different symptom, the same results and require the same medication. Devastating results can result in the bee colony in some years if they don’t get their meds. (pictures taken from web, see links.)                               

Varroa: http://wgbis.ces.iisc.ernet.in/biodiversity/pubs/ETR/ETR49/American%20foulbrood.jpg
AFB: 
https://planbeeproject.files.wordpress.com/2012/11/apis33-l.jp


                Next up for the bees is to basically sit bit and relax a bit but check up on them about once a week. I just need to make they have water, protein, food and enough room to grow. There was lots of flowers available for foraging this past while with the flowers of choice being lilacs, dandelions, and other early perennial flowers both wild and tame. After the spring flowers finish and before the summer flowers, there may arise what is called a “dearth” period, if which there are no flowers to forage on. If they colonies don’t have high enough food stores, they will have to be fed.


Tuesday, 26 May 2015

Ready, Set, Grow


                Hey, sorry I didn’t post anything last week but I have been super busy with seeding, work, and the bees. I started seeding both my gardens on the 19th and we happened to have the same hot beautiful clear weather every day until this Saturday, the 23rd, in which I finished. I put a total of about 26 hours so far into seeding and I accomplished this by after getting off work, driving straight to the garden, and working till about 10 or 11 at night. I usually just used a headlamp or the trucks headlights when it got dark. It wasn’t so bad except for the enclosing sound of coyote howls and yapping approaching as the sun went away. It's enough to send shivers down your spine when all of the sudden the howls stop… but at least I got to see great sunsets everyday haha


                 I feel like I was a little late with my cool season crops but only time will tell  what happens when things start popping out of the ground. Right now there are a few vine crops emerging and the berry bare-root crops showing new growth. For now, I am just waiting for rain and watering lightly to hopefully encourage some germination.

                I didn’t think I would fill up the whole acre but I did! I’m pretty excited how things went so smoothly and how my new garden tools worked out. The bulb planter was definitely a good investment for seeding a 100 potatoes and 600 onion bulbs. Also the precision garden seeder saved my life for corn and bean planting. I ended up planting over 5000 feet of sweet corn which I’m pretty excited about. I hope that the new herbs and other crops that I have never tried before emerge well and that I can recognize any problems that come up. I think I have now perfected row spacing and seed depth management for most crops. The next step is to repot and harden off my greenhouse plants and transplant them out into the garden within the next couple of weeks.


                For the bees, my Dad and I have been medicating them for varroa mites and foulbrood in which I will be talking about in the next post. We were also examining the queens health and seeing that she survived the hiving process, and equalizing any hives to take from the rich hives and give more bees to the poorer, smaller hives. The queens looked great, see below for a picture of one and the finished seeded garden. 


Thursday, 14 May 2015

That New Bee Smell

                Five new hives were added to my bee venture on May 12th making a total of ten colonies for me. I hope to be a big-time beekeeper someday but for now I’m just taking small steps to accommodate the learning curve needed and to avoid catastrophes by beginner mismanagement. Everything went well and I placed these bees right next to my larger vegetable garden at my grandpas old farm. (Sorry in advance for the poorer quality photos Ceone, I only had my iPhone camera on me J)

                The hiving process started in Winnipeg, where I picked up the bee packages at the bee retail and supply store called Beemaid. The bees come in a large tube as you can see called Arataki packages which originate from New Zealand. The package contains a kilogram of bees (perhaps roughly 20,000 bees) and also a queen inside a little wooden cage separate from the other bees.


                A few frames are taken out the hive to make room for the incoming bees and the hive and bee yard is carefully prepared beforehand. The first step is to (after staples are removed) to give the package a sharp tap on the ground (to get all of the bees to the bottom of the tube) and then remove the white cap on top. The queen cage is attached to a green mesh strip and taken out. All of the bees can be poured/tapped into the hive at this point.


                A cork is removed from the queen cage and replaced with sugar/wax. This is done so that the bees can slowly eat away at that sugar/wax barrier and gradually be introduced to the queen to get used to her. This helps to make the colony not so initially hostile towards her. The queen cage is wedged between a few frames, the hive is closed up and that is that! It’s fairly simple and actually pretty fun. My Dad and brother like helping me out with this process.


                The nest step it just to check and see if the queen is doing okay within the next few days and that she’s getting used to the place and laying eggs. I will have to start medicating them soon for varroa mites and American/European foulbrood (more on that later.)  As for the garden, my Dad and Grandpa tilled it up yesterday to make a nice seed bed and I measured out where everything is going to go. Seeding starts as soon as the soil can be worked in and I will start with the bare root stock and cooler season vegetables.


Monday, 11 May 2015

Tubers, Bulbs, Crowns and Slips

                This year I will be straying away from just planting seeds and will be experimenting with different plant propagation techniques and forms. New plants can be produced and planted in many various ways and I think it would be neat to outline several different basic types used in horticulture. (I'm about to dive into a little bit of science and biology so if you are interested, read on.)


               Of course using seeds is a lot of the time preferable. It’s usually the easiest, simplest and most economical process among these and since it is sexual reproduction (two plants breeding together) it leads to stronger, and more disease resistant plants.  This is the only propagating process that leads to genetically different offspring and more genetic diversity.  This can be an advantage for evolution purposes and survival or a disadvantage because you can’t get the same plant that you seeded unless you make it self-pollinate (and some plants can’t do this).  Seeds also take a long time to turn into a mature plant in some cases. There are also plants that don’t even produce seeds or if they do, they produce non-viable seeds.  Most of the plants I’ve dealt with from tomatoes to watermelon to basil are produced by seed and have many different varieties to choose from.

                The other option is asexual reproduction (or vegetative reproduction) which is when a single parent gives rise to an offspring. This can be through vegetative parts such as tubers, bulbs, roots, stems, leaves etc. There is no exchange in genetic information and thus the offspring is exactly the same as the parent – which can be a good thing for the gardener or producer. Other advanced propagation techniques which I might develop into in further years are layering, grafting and budding.


                Potato tubers are actually a modified stem, not a root, and this is because it has buds (unlike a root) and does not absorb nutrients or water (like a root should.) The weird thing is that potato plants can produce seed if conditions are right, but the seeds are either not viable or rare. Also (just to confuse you) sweet potatoes are enlarged storage roots, not stems like the regular potato. The picture below showing the purple leaved plants in a glass cup are actually sweet potato slips. There are many individual “slips” in that cup which are the sweet potato stems that were produced off a tuber by Winnipeg Sweet Potatoes (look her up on Facebook if you want to order some next year. They are a very interesting plant to grow and the person who produces has even more great ideas up her sleeve with her other ventures.)

                 Below are also onions and garlic which are produced by bulbs. The bulb is also a modified stem and the layers are actually thickened leaves for food storage. The green leaves you see above ground are its photosynthetic aerial leaves.  The individual garlic cloves are actually multiple stems that can be separated and planted individually.

                The weird looking forked thing alongside the greyish stringy root thing are actually a rhubarb and asparagus crown. The crown is just the part of the plant where the stem and the root join together just below the soil. These two plants are reproduced artificially and asexually by divisioning an existing plant into different parts and taking a part of the crown with it.


                Also off topic but since I’m talking about different planting techqniques, my strawberries, raspberries and blackberries will also be planted this year with two different methods. The first is the bare root method. This is the much cheaper option and all that you are given is a dormant root with a bit of dormant shoot. The first season planted in the ground is used for producing above ground shoots and plant establishment while fruit is only produced in the second or later years. The other option is purchasing a potted, already established older plant. This may be the more expensive option, but if you’re impatient, you can get fruit within the season that you plant.

Wednesday, 6 May 2015

Indoor Veggie Seeding


It has been an unusually warm spring so far it seems. Everyone is seeding quite early this year but I am still holding back just a touch so that my produce is ready only when the farmer’s market begins and so that I avoid any lingering frost.

                I started my “greenhouse” material this week in my living room on May 1
st. It is recommended that you start indoor seeding 6-8 weeks in most cases before the expected outdoor transplanting.  I tried that last year but the plants became too spindly and grossly large by the time I wanted to plant them outside and, in the end, were largely unproductive and very vegetative. This year I want stouter, stronger plants so I planned to plant my indoor material late and reduce the amount of light they get per day. Too much light (much like last year which was over 12 hours a day) can cause very spindly plants as it turns out.                
                My indoor seeding setup is just made up of two metal kitchen racks I snagged from IKEA. They seem to be able to fit all of my plant material nicely and are able to be adjusted when need. Attached to the metal racks are also greenhouse lights which produce a certain wavelength of light that tries to mimic natural sunlight for greater plant vigor.

                I start everything off by planting 2-3 seeds into little these little jiffy pellets that are basically just a small packet of peat material with enough nutrition and space for about 2 weeks of growth. After they have outgrown that, the plants are transplanted into 4’’ peat jiffy pots filled with potting soil. Once transplanting time approaches and the plants are big enough, they are slowly introduced to the outside conditions by bringing the pots out for an increasing amount of time for about a week. This is called “hardening off”, and has to be done to reduce the stress on the plant by the rapidly changing environmental conditions from inside to outside. The peat pots can then be cut and planted as is into the garden when ready.


               Heat loving, long season crops should be started indoors. I started all of my tomatoes, peppers, eggplants and squash indoors along with some watermelon, cantaloupe and pumpkins. Other crops of this type include cucumbers and zuchinni. These crops can also be planted outdoors when the soil has warmed up enough and when night temperatures are not too cold, which is what I do for most of my vine plants.

                Cool loving, long season crops include cabbage, cauliflower, broccoli, onions (from seed), spinach and kale. I planted a few test pellets of each just because I didn’t have any more space and also because I wanted to compare them to the plants seeded directly into the garden. These crops can be planted either indoor or outdoors.

                Cool loving, short season crops include beets, carrots, lettuce, onion sets, peas, potatoes, radishes, chard and turnips. These grow well under cool conditions, can be planted very early and will tolerate some frost. I should be planting some of these soon.

                Heat loving, short season crops include beans and some early varieties of sweet corn.  These should be seeded directly into the garden after the risk of frost has passed.


Thursday, 30 April 2015

Pruning Apple Trees

                I have never really pruned before but after going to a pruning seminar, doing extensive research and talking to my boss at Jeffries nurseries, I think I now am able to prune an apple tree and tell you how.  I have both 3 year apples trees and a 5 year apple tree and this apparently is the best time to be working on improving the structure of the tree. They are still a little young to prune for the purpose of improving fruit production. Other reasons for pruning might be for removing broken or diseased branches.

                The best time to prune is about now or in the fall when the tree is dormant. You should be taking off 15-20% of branches for young trees or 30% for older trees. If you prune too much off, the plant sets off these things called “suckers” which come out of the ground and resemble a stem. This happens because the roots are now relatively more active than the top growth, and the energy has nowhere to go, so suckers are created; which are counter-productive. Suckers may also appear if the tree is stressed, as you can see in this picture even before I pruned. 

                Pruners or clippers are used for small branches and saws or large shears are used for larger branches. Some say cutting on an angle (45 degrees) is better for shedding water. Others say cutting straight on (90 degrees) leaves a smaller surface area for diseases to infect. I choose straight on but we'll see how that goes. I was told at the seminar that you should cut low down to the collar of the branch while other people I have talked to said to leave a 1/4'' of branch left. I chose to do some of each. The picture below is a spur, a short stubby twig that will flower and produce fruit. It is recommended to prune spurs for larger fruit and to produce more spurs. Also remove any that are too close together or diseased.


                Types of branches you should be cutting of are ones that are criss-crossing, broken, diseased, downward/upward growing or are making narrow crotches. Apples trees also tend to have a dominant stem right in the middle that all of the other branches come out of. This is called having a central leader. Some people may keep it this way but others may strive to have an open centre. This allows for more air-flow, adequate light to hit all of the leaves and a higher yielding, more productive tree. In some trees, I kept the central leader because it was hard to remove without removing a large portion of the tree but in my older one (seen below) I strived to make an open centre.

     
    I have never pruned these trees before so I pruned them very hard. I think I may have pruned too much but they say it’s difficult to prune an apple tree too hard. I'll let you know what I did wrong later but here are my before and after pictures of the one tree. Sorry I rambled on a bit but it turns out that pruning trees in general is sort of an art and like most arts, it takes a lot of practice to get good. Just remember to stand back once in a while and look at the bigger picture. 


Monday, 27 April 2015

Hive Sweet Hive


                Bee season is on the way! Things are about to warm up and my bee packages from New Zealand will be coming soon (most likely mid-May, more on that later). This means that these bees will need a home. Over the next couple of weeks I will be building hive supers and frames and transferring my bees from last year into nucs… these beekeeping terms may be confusing, let me explain...

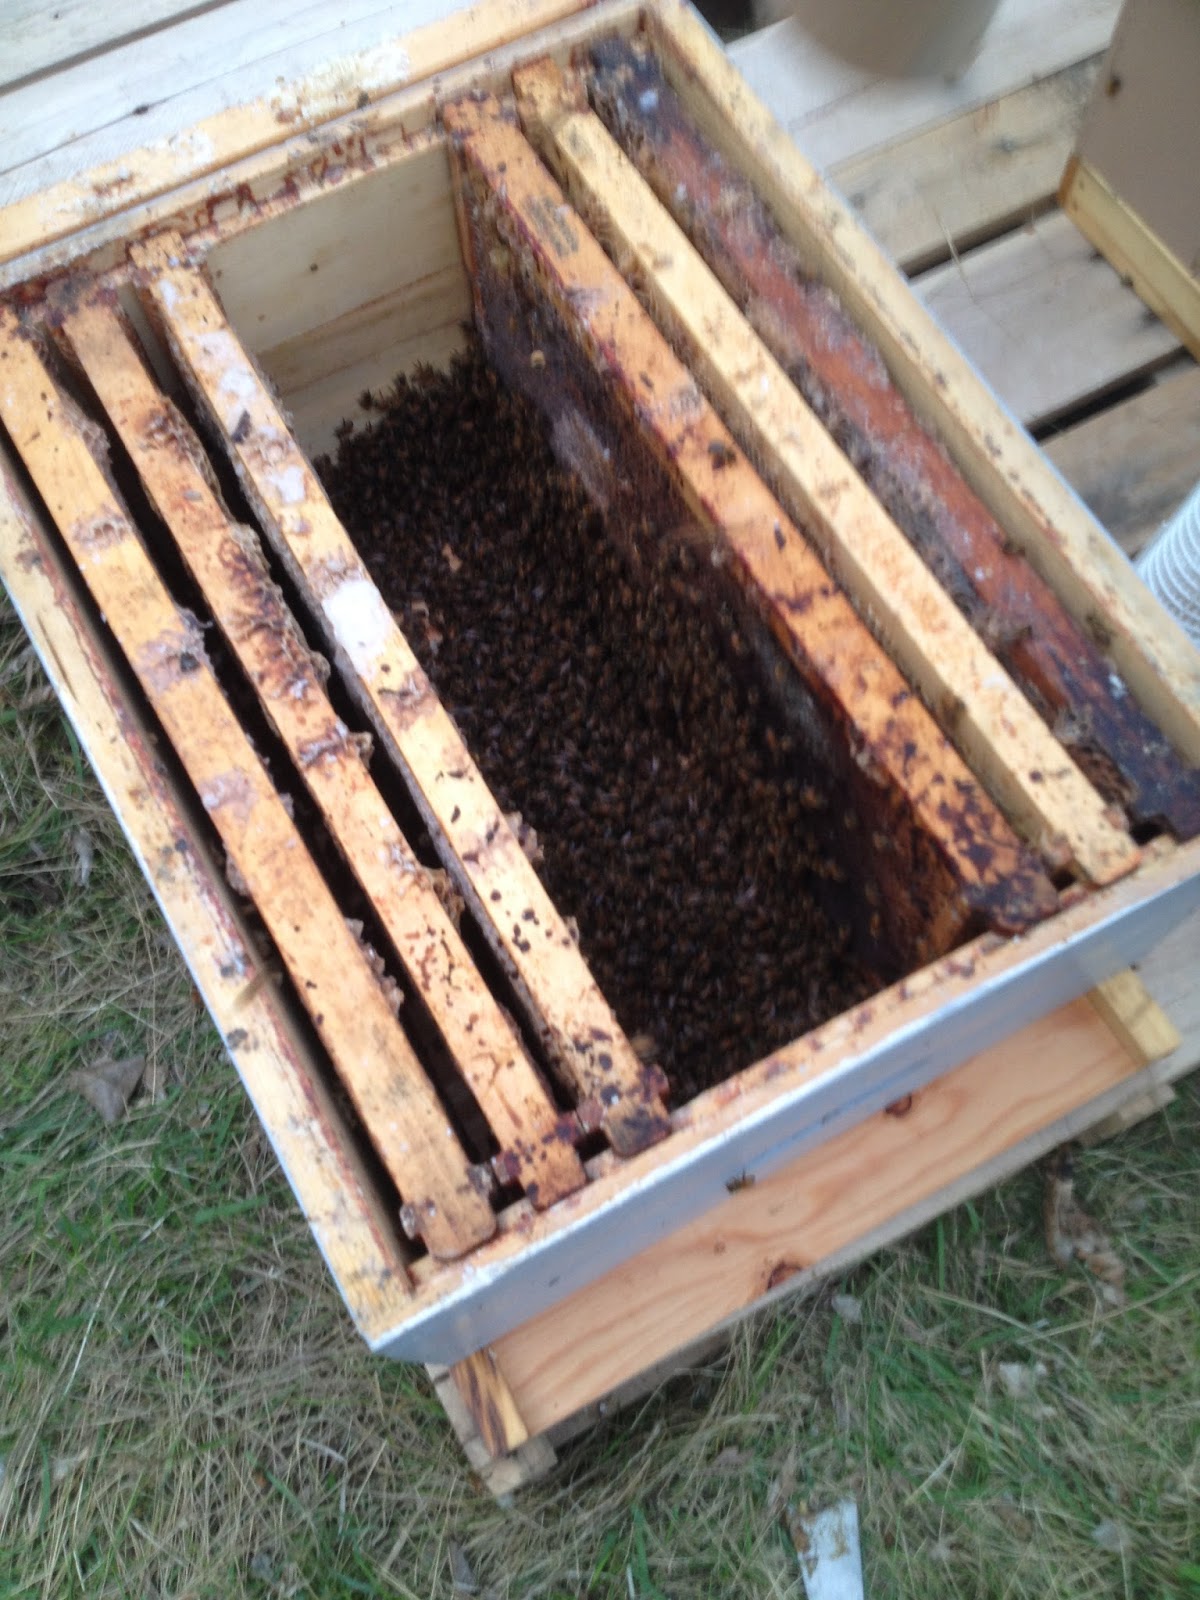
                The pictures below compare a typical hive and a nuc. A hive can be composed of many parts and houses a larger colony to produce a honey crop for the beekeeper. A nuc is, as you can see, half the size of a hive ("nuc" is short for "nucleus"). Its purpose is to care for smaller bee populations, house bees from an overcrowded colony, care for spare queen bees, or rear new queen bees. I will be putting my bee colonies into nucs this week because they did not overwinter that well and having a smaller home is easier for them to take care of and keep warm.


                The next picture below outlines the components and pieces of a hive. Starting from the bottom, there is a bottom board which is intended to be a base for the hive and a landing platform. The brood chamber is where the queen lives, lays eggs and gives rise to brood (bee larva). There may be one or two brood chambers at a time (depending on the beekeepers style.) The queen excluder stops the queen from going to the top of the hive (since she is full of eggs, her abdomen is to big too fit through the grate.) This is to avoid eggs being laid among the supers. The supers are where the honey is stored. As the season goes on, more supers are added to the top to make way for more honey storage. There may be as much as 5 or more supers near the end of the honey flow, depending on how strong the hive is. And lastly, the hive cover tops it off to complete this bee shelter.


                Inside both the brood chamber and super, there are frames of honey comb. There are usually 9 – 10 frames per box as you can see in the picture below. My hive equipment I got last year was bought used from some guy in Manitou, and you can tell just how used by the color of the honey comb. The dark color is from many uses in the brood chamber. The frame darkens as more larva hatch out and shed their cocoons. Honey comb not used in the brood chamber stays nice and bright. You can also see the crystalized honey on the side of this frame which means that this frame will be great for putting into spring colonies.